Showing posts with label Creativity. Show all posts

Saturday, June 29, 2013

Telling My Own Story


All my life I’ve been trying to tell everyone else’s stories.  From tattling on misbehaving siblings to endlessly repeating other people’s anecdotes, I can’t seem to shut up and realize that my own story is worth telling.

We watched “The Help” last night and I saw the women in church fanning their faces with cardboard fans, moving them back and forth in the sluggish hot air of Jackson, Mississippi.  I remembered those fans somewhere else, in the same humid heat: those oddly decorated shapes with bearded long-haired Jesus figures on them, browned around the edges with age, their oversized popsicle stick handles shifting the air back and forth, back and forth.

I have so many memories like this.  They jumble together into a shared blend of truth and myth in my own mind.  It's difficult to remember what happened and what didn’t, what was created within the limitless boundaries of my own gigantic imagination and what actually took place.

I was a premature baby, born in November 1979 when I should have been born in January 1980.  I squeaked into the decade of the seventies by a mere six weeks.  It was as if I was already saying to the world, “I will always be a little bit ahead of myself, diving into the future full of impatience, yet loving the past until it breaks me.”  

And it has.

I grieved over not having been born during the time of the American Revolution, when I was in love with that time in history.  This palpable sadness was fresh every time I fell in love with a new, exciting era. Laura Ingalls Wilder’s pioneer world. Harriet Beecher Stowe’s pre-Civil War era.  John Bunyan’s English Civil War.  Often it was connected to countries.  Russia, in the time of the Romanovs.  Hudson Taylor’s China.  Chopin’s Poland.  Refugees, from anywhere forsaken and struggling.  

Why?  Because I read constantly.  My brain absorbed fact after fact, story after story, but did nothing with them.  It soaked words up like a greedy sponge and dripped with the excess.  I had nothing to do with this excess, no outlet through which to feed it, apart from sewing costumes and dressing up like favorite characters, or writing copycat stories in my own way.  

And I’ve never appreciated my own story, always wishing to live the lives of others, always wanting something different.  

In my own head, though, I’ve always been telling my story in third person.

She sat, barely breathing, in the darkness of the closet.  The clothes hung like a wall in front of her.  She knew she was concealed from the seeking eyes of her younger brother and sisters as they searched the house, calling for her.  They wanted her to think up the next game, an exciting plan of action for the fun of the day.  She had a new book to read,and wanted nothing more than to hide away with it.  With a gentle click, her flashlight switched on.  Without making another sound, she opened her book and began to read.

Just like that. Or,

She listened to the gentle soothing sound of her grandmother’s voice. Here you are, lovey.  Put this on.  It was a crisp cotton dress, yellow with red strawberries dotted across the material.  The dress went over her head and was buttoned by someone. She was vaguely aware that she was wearing a bulky cloth diaper with uncomfortable rubber pants stretched over it.  She liked the beautiful new dress because it covered up the babyish diaper and she felt like a big girl.  Sunshine illuminated the window where she stood, and she looked out to see the nearby church parking lot covered with rocking chairs.  She had no understanding of the peculiarity of this. People sat in the chairs, rocking, rocking, rocking.  A typical 1980’s church fundraising event for adult eyes: just another day for a toddler.

Sunshine and my grandmother’s voice still speaks to me.  Here you are, lovey.

Those memories really happened.  The ones that haunt me are the memories that didn’t.

She walked through the crowd in the church, steadily moving towards the back.  Her goal was the kitchen. It was, quite literally, full of people.  She pushed through them until she reached her grandmother, who looked up in the midst of food preparations and exclaimed, Oh, lovey!  She hugged her grandmother, her thin grandmother with bones that seemed so poky and fragile, and then woke up.  She was at home in her own bed, somehow feeling her own elbow, bony and sharp just like her grandmother’s had been.  The dream was an airy nothing, not even a real memory. But she had heard her grandmother’s voice as clear as day, as if she’d really spoken to her.

They sat tying the quilt. Threading the yarn, stitching that one binding stitch, and knotting the ends into a little bump on the quilt top.  They were silent, but the sounds of a cassette tape beat out a steady rhythm to their work.  In fine Queen’s English, a theatre troupe dramatized Shakespeare’s Romeo and Juliet aloud.  The sewing fled through their fingers as the words flowed through the room, and the quilt was finished before they knew it.

See, there are stories to tell.  But I don’t know how to begin telling them, because I am the queen of editing. In my father’s complimentary words, I edit “with a pick-axe.”  Though I will adequately go over the work of others and have no problem shaping it grammatically, with my own written work I am never satisfied, combing over and over it until I stop in frustration.  My art teacher called me “Erin the eraser” with good cause.

For me, telling my own story would be an exercise in non-editing.  I will refrain from going back and forth agonizing over paragraphs that have too many repeated words, or sentences that display dodgy grammatical effects.  Grandmother would have enjoyed pointing out the errors to me, and we would have laughed at them together.  We cannot do that now so there is no point worrying too much about inevitable mistakes or irregularities or imperfections.  

I will write today, and write tomorrow, until there is nothing left to say, a stream of thoughts tumbling out across the whiteness of this page until my fingers are exhausted and my mind is blank and the memories --the dreams and the realities-- are played out.  I will write until I fall in love with my own era, and my own story.

I walked through the rooms of my grandparents’ house.  It was dark.  A nightlight burned in the hallway. I stood in the doorway of their bedroom.  My grandma, once so large and strong, was like a shrunken bundle in the middle of the bed.  Alone. I turned away and looked at the silent living room. My grandpa’s comfy chair, his immobile throne of watchfulness, was empty.  He was gone.  I smelled the familiar smells, sorting them out in my head: wood polish on those handcrafted cherrywood floors, stale frying from breakfast, coffee, dusty years heavy on this house so old and loved.

Sometimes the dreams are funny.

I went back for breakfast.  They were trying to figure out how to make it for me, arguing and grumbling between themselves.  She, trying to help, he wanting her to just sit down and let him do it.  The entire time I was thinking: “You two are dead. What am I doing here?”

And so these dreams become tangled in the truth, mired in the myth of my own history.  They should be written down before my mind too wanders away like theirs and becomes a thing not to be trusted, a winding river of stories lost in the current of time.

Monday, June 10, 2013

How to Make Your Own Homemade Container Candles


I've written before about making container candles, but this post will explain the process in detail, so you can make your own.

Preparation:
  • Soy wax flakes for container candles --soy burns at a lower temperature than paraffin and burns quite cleanly and efficiently, leaving very little candle left inside the jar.  [I use soy currently, though I'd like to find a non-GM substitute] I buy mine from eBay shop Torbay Supplies in 10kg boxes --it's cheaper that way!  For starters, I would advise purchasing about 1kg. 
  • Candle fragrance oils --these are artificial, unlike essential oils. They are specifically formulated for optimum burning.  You can try using essential oils, but you will need to use quite a large amount to obtain a good fragrance, and remember that their "burning smell" will differ slightly from their normal scent. Good-quality candle fragrance oils can be found at reliable eBay shop Candles and Aromatics
  • Emptied, clean jam jars --look for jars with a diameter of more than two inches but no more than three.  
  • Pre-tabbed candle wicks --these are cotton [lead-free] wicks already attached to the round metal tab that will secure them to the base of the candle.  I purchase 5" or 6" wicks on eBay from the same shop as the candle fragrance oils mentioned above.
  • Glue gun or super glue --to attach the wick's tab to the base of the jar.  I prefer using a glue gun, as the used tab easily peels away from the base of the burned-out candle when you want to clean the jar for recycling or re-using.
  • Ball-point pen barrel --using a regular ball-point pen, unscrew the components and discard until you're left with the tube.  Your wicks will be threaded through this and used to tamp down the tab at the bottom of the jar as it's gluing to the base.
  • Ice-lolly [popsicle] sticks and clothes-pegs --used to clip and balance the wick so it stays in the centre of the candle during the process.  I also use ice-lolly sticks for stirring the melting wax.  
  • Stainless steel saucepan, Pyrex glass jug, and stainless steel teaspoon

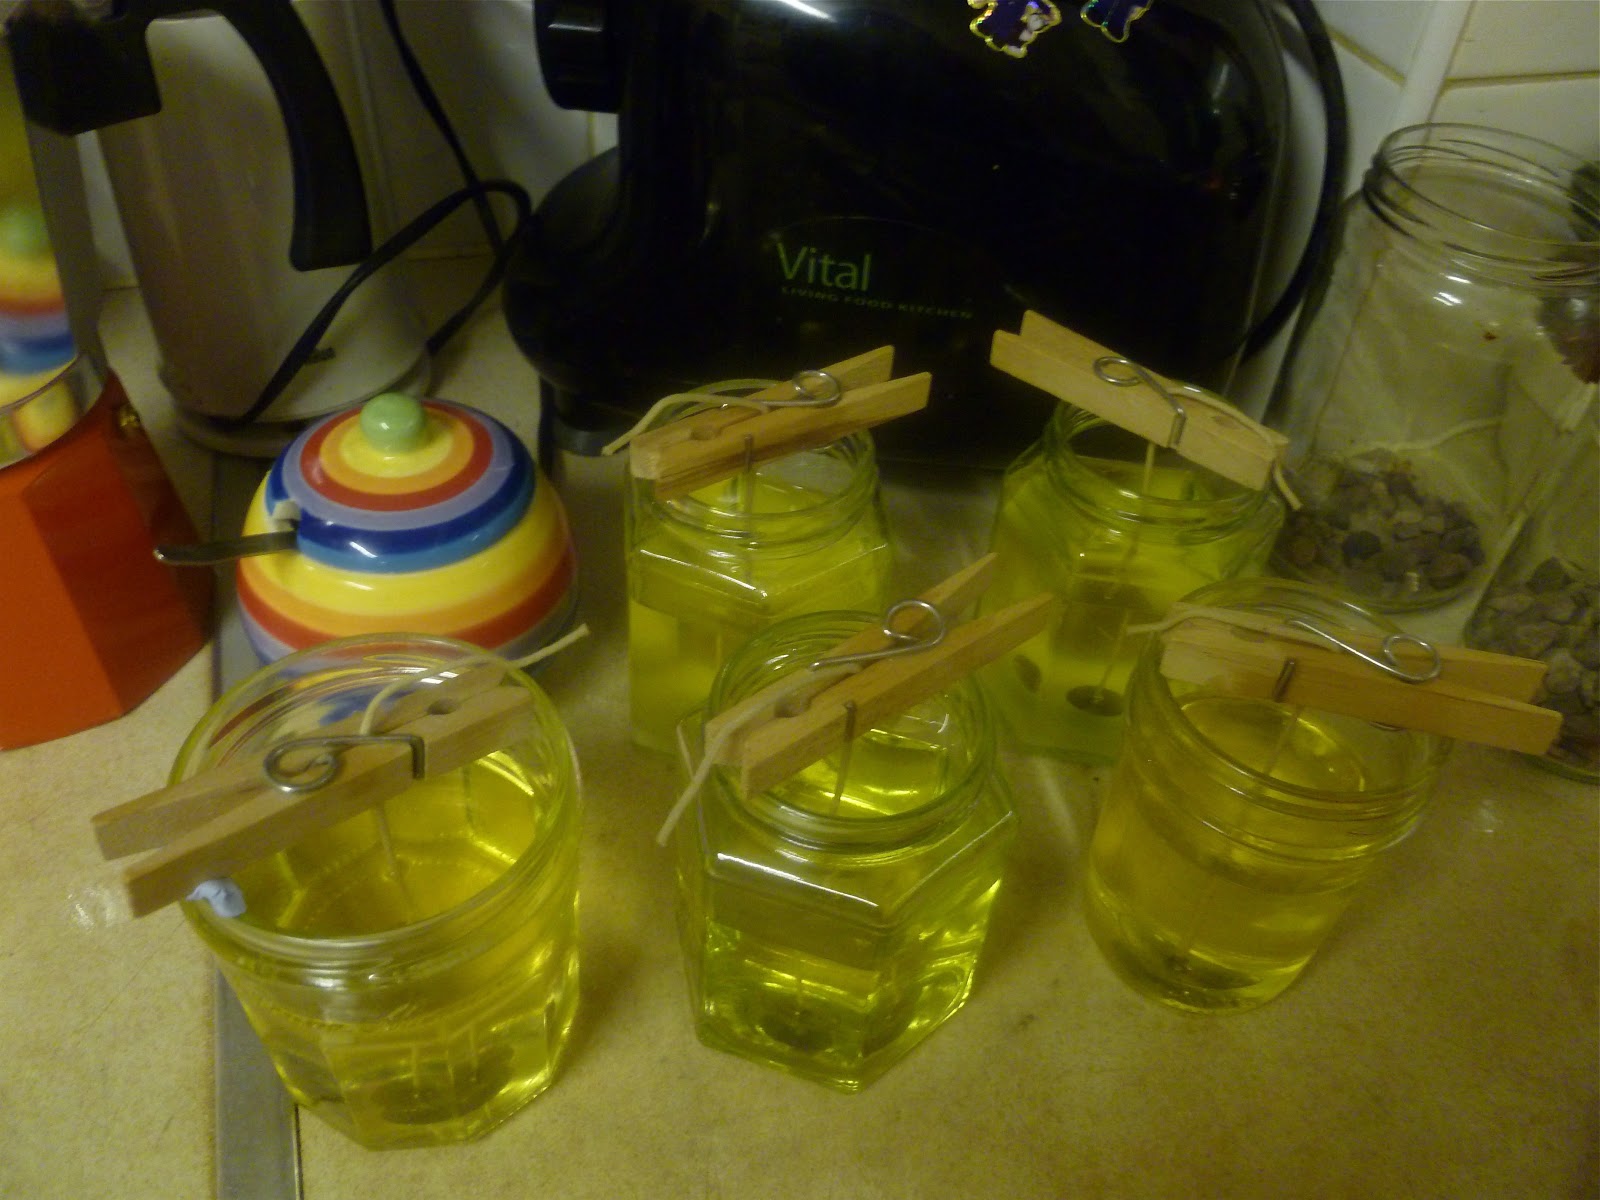
Preparing the jars:  Pre-heat oven to gas mark 1.  Set jars on an oven-proof tray.  Glue the metal tabs of the wicks to the base of the jar, centring as well as you can, manipulating and pressing down with the help of the ball-point pen tube.  If the mouth of the jar is wide, rest the ice-lolly stick across the top of the jar.  Straightening the wick as well as you can, peg it with the clothes-peg and balance it on the stick, or on the edge of the jar.  Set the tray of prepared jars aside until the soy wax flakes have melted.


Melting the wax:  I melt soy wax flakes using a double-boiler method, in a Pyrex glass measuring jug placed in a small stainless steel saucepan of simmering water.  Soy wax melts at low temperatures and will not burn your skin if the melted wax makes contact, but do use caution while melting wax!  Some candle-making instructions describe melting it in the microwave but I've never needed to try this. The stove-top melting method is incredibly easy, with little clean-up involved, and the temperature of the wax can be easily controlled.  The temperature you want to reach for melted soy wax is 90C, and you can use a kitchen thermometer to test this.  For one medium jam jar candle, fill the jug about 3/4 full of wax flakes.  This will melt to around ten ounces of liquid wax.


Heating the jars:  When the wax flakes have nearly melted, place the baking tray with the prepared candles into the oven to heat.  This process acts like a test of the jars you're using.  If the glass of a jar will not be able to stand the heat of the burning candle or the hot wax, it will split at this temperature.  Don't worry; jam jars unable to withstand heat are rare! I've only had two broken ones out of the seventy-plus candles I've made so far.  

Pouring:  After the jars have been in the oven for five minutes, remove them.  Remove the jug of hot wax (heated to 90C) from the double boiler and allow to cool to 65C before adding the fragrance oil. You will need about 3ml of fragrance oil for every 100g of wax that you melted.  This equates to around 1- 1.5 oz of fragrance oil for every 16 oz of liquid wax. Stir well and pour the fragranced, liquid wax into the hot jars.  Stabilise the wick, ensuring that it is in the centre of each candle.


Finishing: Set candles aside to cool in a safe place.  Allow them to cool for twenty-four hours before burning. To finish, trim the wick to one-quarter of an inch, and keep it trimmed to this length as you burn through the candle.  Burn candles for no more than two hours at a time; this enables them to burn down evenly.

Clean-up:  Wash all utensils and containers used in hot soapy water.  Melted soy wax cleans up very easily and you should have no problem removing it from the everyday kitchen items you've used.

Any questions about making container candles at home? Ask me in the comment box and I'll do my best to answer!


Sunday, May 19, 2013

Creating Bunting

Whenever I embark on a new creative hobby, I don't usually remain enamoured with it forever.  After a few months or even a year, I abandon whatever I've started for a newer idea.  

However, bunting seems to be the exception to the rule at the moment. My sewing bag is currently stuffed with bare triangle cut-outs, sewn flags waiting for strings, and stacks of folded fabric, chosen but uncut as yet.

These are the last three buntings I've made: one purchased by a friend, and two for gifts.  All three are reversible, so you'll see one side and then the other.  The Union Jack one is reversible but the sides are identical.

Mandie's: 


Josie's: 


Lauren's:


As much as I'm loving sewing these fabric treats, here's a hint at the possibility of a fast-approaching future obsession.  

When I was in my teens, a favourite hobby was hand-sewing delicate Barbie doll costumes for my sisters' dolls. Ridiculously shaped as she is, Barbie is a perfect mannequin for creating intricate costumes. I'd pore over catalogues like Amazon Drygoods, copying their old-fashioned patterns into something daintily wearable for Barbie.

I haven't made Barbie doll clothes for years, but I remember well the feel of beautiful fabrics under my fingers as I hand-sewed them into period clothing reproductions. We took the kids to a Middle-Earth event last weekend, and Coo fell in love with the LOTR costumes she saw worn by the more dedicated fans.  The more elvish the ears and the longer the velvety skirts flowed to the floor the more she exclaimed.  

And I began to think about costumes, and a little girl, almost like a real live doll, who would be ecstatic over them, much more than an unappreciative Barbie...

Saturday, May 18, 2013

Olive Palm Soap

This was a quiet evening of soap-making --very necessary, too-- as our last bar is rapidly vanishing in the downstairs' toilet's "soap-shell".  

My friend Becky, inspired to make her own cold-process soap, came round to watch the entire procedure.  

I tried a new recipe: "Olive Palm Soap" from Anne Watson's inimitable book Smart Soapmaking.

I used patchouli, sweet orange, clove, cinnamon, and sage essential oils to scent this soap.  It's deliciously spicy, with an olive bite.  I'm guessing that the tang will soften in time, as this is one of those soaps that needs to ripen for a while before being used. My two favourite recipes so far from Smart Soapmaking, "Anne's Longer-Lasting Soap" [cocoa butter, avocado butter, palm oil, coconut oil, and shea butter] and "Anne's Shea Butter Supreme" [coconut oil, olive oil, and shea butter] have been ready to use right away and I've never left them to dry out for a few weeks before trying.

Becky and I discussed the possibility of making milk soaps.  I looked up Anne Watson again, and sure enough, she's been there already!  Her book, Milk Soapmaking, is now on my Amazon wish list.


"Mummy, take a picture of me with the soap!"


Friday, May 17, 2013

Shabby Chic

I say this about so many of them, but I really think this is one of my favourites.  I love putting these baby feelie blankets together: choosing the colours and ribbons, pinning, sewing; creating a tiny work of art to be enjoyed and appreciated by a little baby.

Saturday, March 30, 2013

A Hobbitty Cake

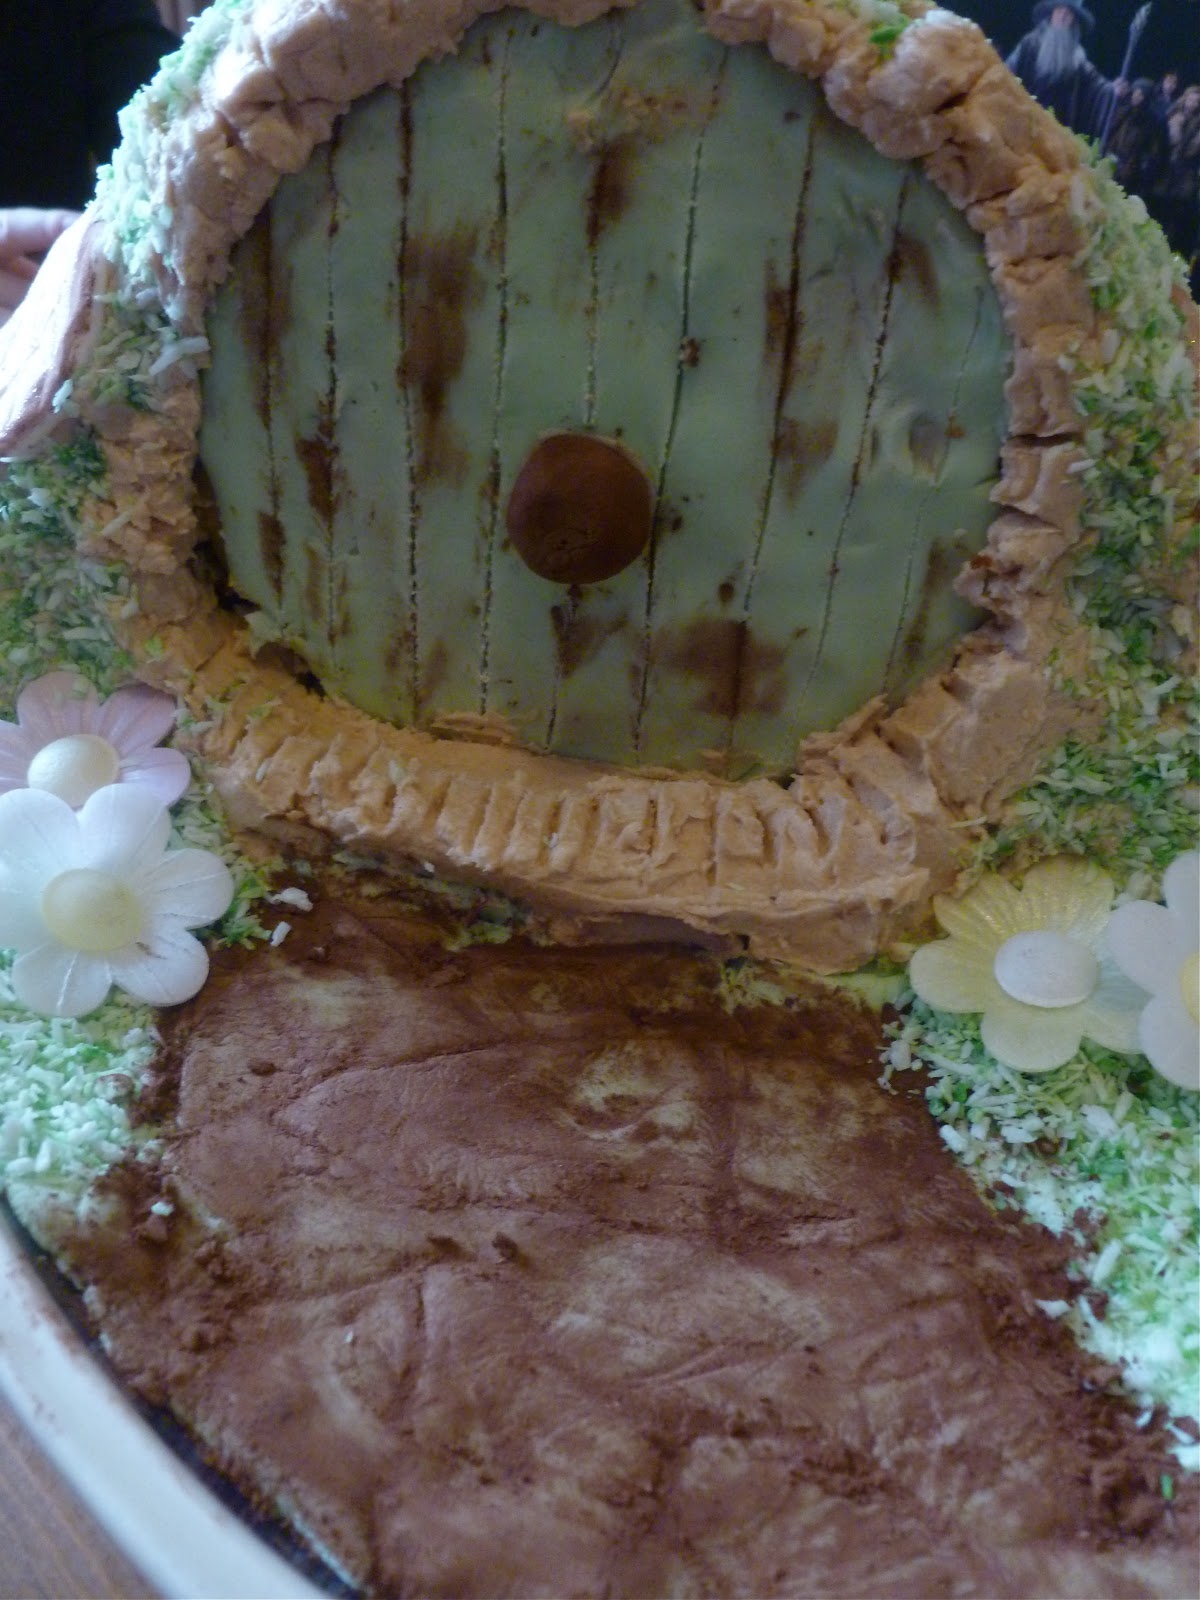
When the kids realised Christmas was over and we had forgotten to make our traditional gingerbread house, Mr J suggested we make a gingerbread hobbit hole for Easter, instead.

His idea morphed into the cake I created yesterday. As you might already know, hobbit holes are curved, comfy dwellings etched into hillsides. Angled, straight-lined gingerbread is not very conducive to curvy comfort, but soft cake most definitely is!


I whipped up the super easy spice cake recipe detailed below and divided it between two containers for baking: an eight-inch round cake tin, and a similarly-sized stainless steel bowl.  When the cakes were cool, I sandwiched them together with an icing glaze, after cutting off a few centimetres at the front to create the indentation for the door.  These extra slices of cake provided a doorstep, and some height above the door of the hobbit hole.  


The door itself was a large round cookie, an adapted healthier version of traditional rolled sugar cookie dough.  I kneaded green colouring into white fondant icing and rolled it out to fit the door, using a toothpick and cocoa powder to create the detail.  The door handle was a tiny piece of white fondant, rolled in cocoa powder.  The two round windows were also bits of white fondant, covered in gold sparkle and detailed with a toothpick. I iced the entire hobbit hole with cinnamon-spiced buttercream, and sprinkled it with green coconut grass.  

Mmmm.... delicious!


SPICE CAKE
  • 1 1/2 cups wholemeal spelt flour
  • 1/2 cup brown rice flour
  • 1 1/2 cups raw caster sugar
  • 1 tsp baking powder
  • 1 tsp bicarbonate of soda
  • 4 tsp ground cinnamon
  • 1/2 tsp freshly ground nutmeg
  • 1 tsp mixed spice [or allspice]
  • 1 cup coconut milk, melted with:
  • 1/2 cup butter
  • 1 tsp vanilla extract
  • 3 eggs
Whisk together flours, sugar, baking powder, bicarb, and spices. Separately, beat eggs and vanilla into cooled melted butter/coconut milk mixture.  Whisk two mixtures together well and pour batter into oiled/floured/lined baking tins of your choice: either the bowl and the cake tin if you're making your own hobbit house, or alternatively two dozen cupcake/two eight-inch cake tins.

Bake for about 45-50 minutes in a pre-heated 350F/180C/gas mark 4 oven.

When cool, ice with buttercream of your choice.  Ours was this:


CINNAMON BUTTERCREAM ICING
  • 1 cup softened butter
  • 1 TBS vanilla extract
  • 2 TBS cinnamon
  • enough icing sugar to create a creamy consistency: about 2-3 cups
Beat together butter, vanilla, and cinnamon until well mixed.  Add in icing sugar, a cup at a time, until the right consistency is reached.  Cover cakes or cupcakes with icing and top with coconut.


For homemade, greener alternatives follow the link to Beth's blog and find more bloggers' household tips, recipe ideas, and creative stuff!

Wednesday, December 19, 2012

Mocha Lip Balm


This dark, deliciously shimmering lip balm smells faintly of honey, strongly of coffee, and looks like chocolate.  Mmmm! 

Lip balm is one of the easiest homemade body-care items you could make; it was certainly the first homemade toiletry I ever created. Look for these ingredients on Amazon or in your local health food shops.  This recipe is, of course, great as a lip balm but also soothing and healing [because of the shea butter!] for dry, chapped hands.  

MOCHA LIP BALM
makes eight 15ml jars
2 TBS natural beeswax, grated
1 TBS unrefined shea butter
1 TBS unrefined cocoa butter
1/4 cup organic virgin coconut oil
1 tsp honey, preferably raw
4 drops GSE
10 drops vanilla essential oil
20 drops coffee essential oil
1 tsp organic cocoa powder
1/2 tsp natural gold mica powder

Basically, the beeswax and fats need to be melted together, and then the essential oils and powders can be added.  I use a small stainless steel saucepan: fill it with a few inches of water, and place a Pyrex glass jug into the pan. Put the grated beeswax into the jug and set the pan over a low heat.  As it begins to melt, stir in the butters and oil, and the honey.  If shea butter gets too hot it will become grainy, so stir consistently and keep the heat low.  

While the oils are melting, pop a few clean small jars into the oven on a low temperature to warm.  I like tiny used jam jars [currently scoring mine from Starbucks; yeah, it helps to know the staff!] but you can also buy little cosmetic jars on eBay brand-new, if you prefer.  This recipe makes eight 15ml jars.

Back to the stovetop: remove the pan from the heat and, using a fork, whisk the cocoa powder and gold mica powder into the melted oils. Add the GSE and essential oils.

Pour the liquid balm into the hot glass jars, slowly and carefully.  Whisk the mixture before you pour into each jar to ensure a more even distribution of ingredients.


Set aside, uncovered, to cool overnight.  In the morning, put lids on the jars and give them a bit of a wipe down to remove any spills.  


In a hot climate or in extremely warm weather, it's probably best to store this lip balm in the fridge.  Also, if you are planning on giving this away, please remember that it is not appropriate for people who are allergic to nuts, because of the shea butter!

For more ideas about homemade and eco-friendly things you can make or do, visit Beth's blog and follow the links on her Green Resource post:

Thursday, December 13, 2012

Yule Log

Most Thursdays, I meet up with other home educating friends, just a few of us --as many as our house will hold! Our project this afternoon was a Yule log centrepiece.  This is what our table looked like today...


I made our family's Yule log by myself.  The three boys were too busy playing with all their friends, and Coo was fussing over tiny wreaths and ribbon.


But later, they breathed their appreciation of it, especially when when they noticed the tiny stars cast over it by candlelight.

Wednesday, December 12, 2012

Cookie Decorating with the Littles

We decorated cookies today: Mr J, Coo, and I.  


First, they ate cookies and icing until they were tired of sugar. Mr J began to decorate cookies in earnest after consuming two cookies.


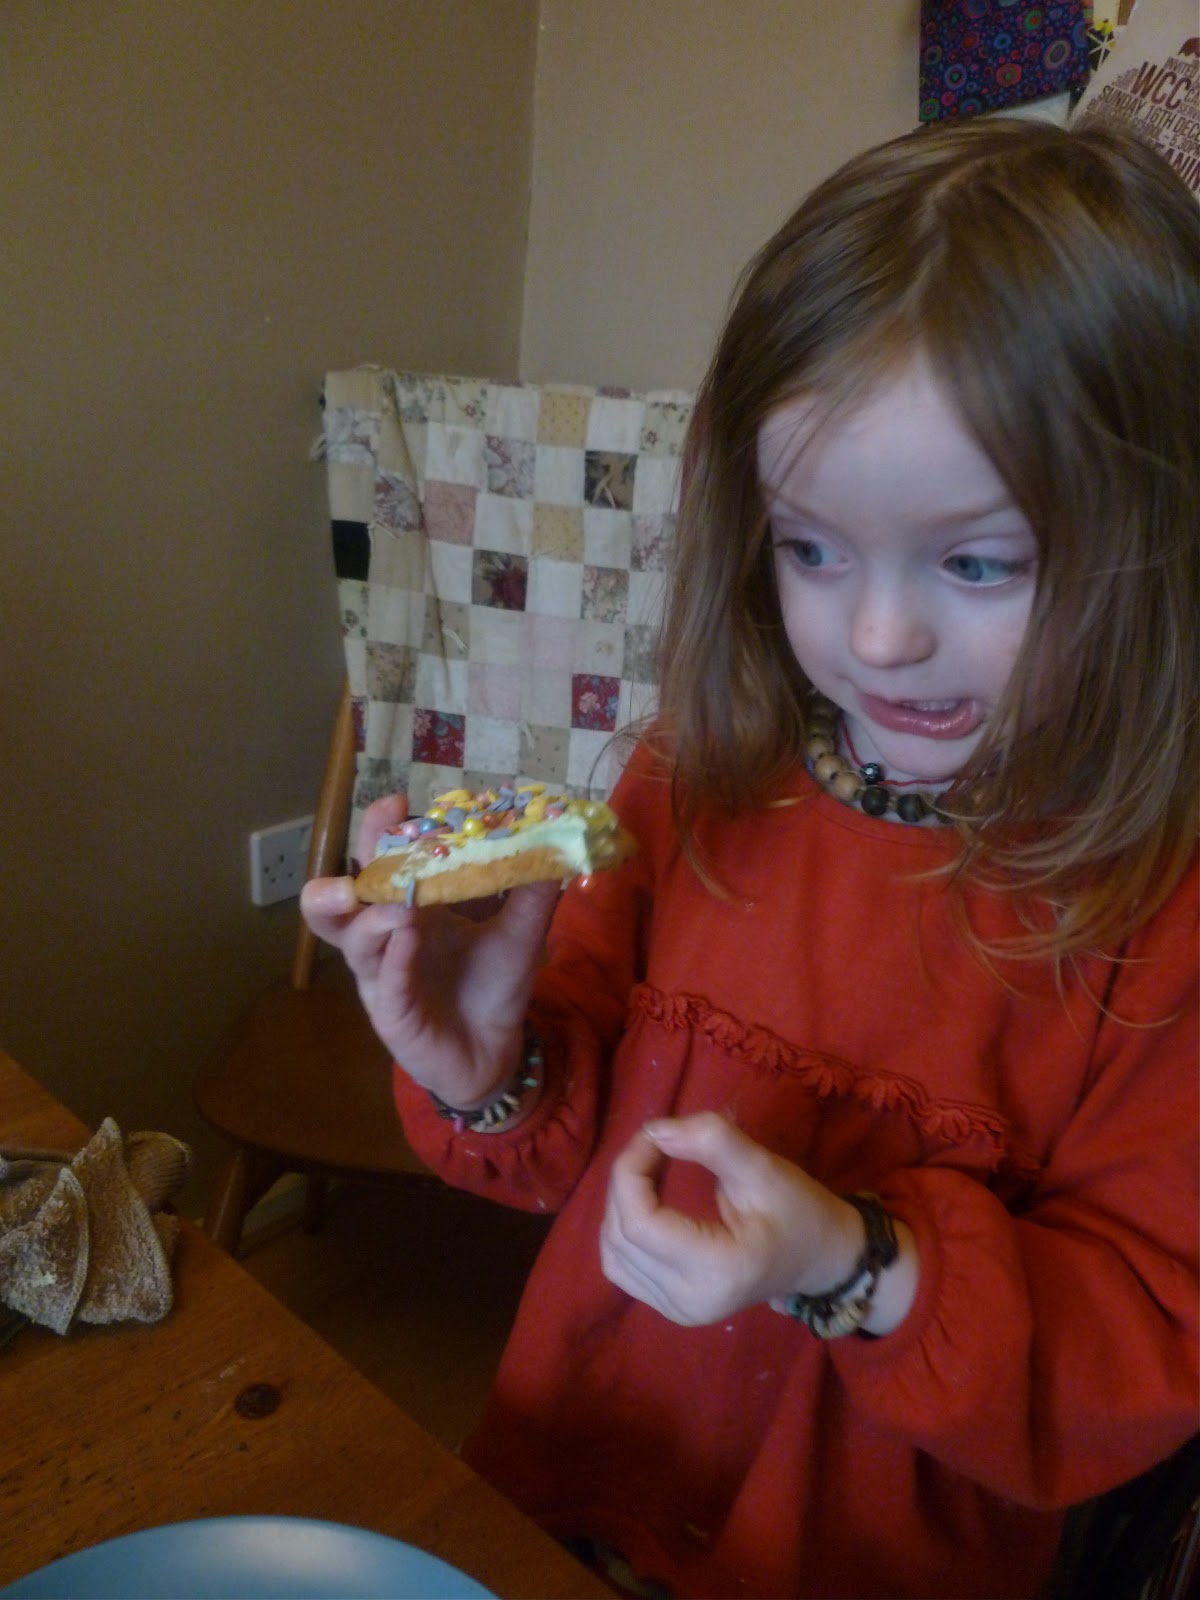
Coo ate half of a cookie piled with pale green icing and sugar sprinkles, licked the remaining icing from the rest of the cookie, and then decided she was ready to start decorating, too.


I explained that because we were decorating cookies for other people, we didn't need to keep tasting the icing on every single cookie; and also, it wasn't wise to lick our fingers and then use them to put sugar sprinkles on the iced cookies.  With these simple boundaries in place, the rest of the cookie decorating came off without a hitch, and we ended up with these lovely sugary treats to share with our friends tomorrow.

Monday, December 10, 2012

Handmade Christmas

A peek into 2011 Christmas cookie madness

After a decade of baking piles of cookies at Christmas, I decided to take a break from them this year.  As much as I love trying to beat my own records of how many cookies I've made in previous years, it was time for something new.

Two years ago, I invested in soap and candle making supplies with the intention of making soap and candles as Christmas gifts. However, Christmas cookies took precedence and I didn't have time for anything else, and the same scenario was repeated the year after!

I decided this year was going to be different, and scratched "Christmas cookie making" off my holiday "to do" list.

I started making cold-process soap in the spring, and we've enjoyed using it throughout this year.  A few extra autumn batches were enough to use for gifting.

The unused candle supplies were tempting me, too, especially after my friend Katy gave me a homemade candle for my birthday.  I decided to completely scrap Christmas cookie-giving this year, and instead pour all my creative energies into candles, soap, and lip balm. Eventually homemade granola was added to the list of "giftables". After finishing eighteen container candles, two batches of soap, three of lip balm, and five of granola... I was ready to drop, but it was worth it!

The usual round of holiday sewing included "dress-up" bags for all four kids. These have been in the works for a while, but Christmas giving was the impetus I needed to complete them.  They are large enough to contain the boys' wooden swords and bows, close with a drawstring, and have a strong loop to use for a handle or for hanging them from a hook. The boys' bags are sewn from Ikea Tidny black on white fabric and can be coloured in with Sharpies to personalise. Coo's bag is bright and cheerful Fredrika, at £4 per metre great value for money.

When Coo asked for "my own tiny bunting" for Christmas, I could not refuse.  It was the smallest string of bunting I've made yet, and she was over the moon about it.

Monday, December 03, 2012

Using the Soap Mould

A beautiful, untreated pine soap mould was my birthday present from Dan.

And the first time I've used it?  Tonight, for a recipe I've not tried yet until now: a blend of coconut oil, palm oil, avocado butter, cocoa butter, and shea butter.  Fragranced with woody patchouli, sharp sage, flowery lavender, warm clove and spicy cinnamon essential oils, this batch smells deliciously and distinctly Christmasy.

I chatted with Dan's mum, put Coo in her bed, and had a short pause to make a cup of coffee to drink halfway through, but managed to combine the lye solution and the melted fat without the aid of my digital thermometer, which died a watery death when I dropped it into dishwater last week.  Instead, my old-fashioned candy thermometer worked just as well --better, even!


Soap-making = addictive.  Who knew? But I guess I could have chosen worse things to become addicted to!

The windows are frosty with cold, the sky is clear and well-lit by a bright moon, and the Christmas tree casts a relaxing, warm glow around me as I sit here in our silent lounge, writing.

The satisfying thought of fresh soap saponifying and cooling in the new soap mould just makes the evening perfect; and now the news of a royal baby on the way, too!  I think it will be a girl; but we shall see...


Sunday, December 02, 2012

Advent Activity 1... Decorating the Tree

My sister Emily made our Advent box with twenty-four matchboxes, glued together and decorated.  It's nearly identical to the one we had when we were little.  Inside each tiny drawer are treats; in previous years they've contained small sweets or stickers.  This year, there  are stickers to share between the four kids every day, and in seven drawers, either an Advent Activity or an Advent Treat.

Today was our first Advent Activity... decorating the tree!

We made it to Ikea just in time last night to take advantage of their offer: buy a real tree and receive a £20 Ikea gift voucher to spend in January.  In the car on the way home, the tree was named Treebeard [naming is evolving as a family tradition], in honour of the considerable amount of Middle Earth mania gripping us this month, for rather obvious reasons.  The only downside about our Ikea tree is the fact that it was grown in Denmark.  So much for buying local.

I can post no photos of our tree decorating event [hope to be sorting this issue with Blogger soon], but you can look at last year's decorating post, if you want.  Suffice it to say, this afternoon contained plenty of popcorn eating [both plain salted, and maple cinnamon spice], as well as decorating. Coo helped me thread popcorn; she was so good at it!  We managed one short string of popcorn... we were eating most of it! Our housemate James and friend Curt created a Christmas music playlist to listen to.  Lefty and Righty were caught up in building Lego spaceships, but Mr J and Coo enjoyed helping me hang the ornaments carefully on the tree. Treebeard has very soft, fragrant needles, quite unlike last year's tree, and the ornaments have to be placed securely.  We have no baubles or tinsel, but I was thinking I might find cranberries and string those too, for a bit of added colour.  I remember my mother doing that when we lived in upstate New York.

The Second of December, 2012... already?  It seems as if we were doing all of this not so long ago!

Saturday, December 01, 2012

The St Nicholas Bag

This is the earliest I've ever decorated our house for Christmas.  I unpacked our little Christmas box on the final night of November, taking out all of the familiar things and stringing up extra fairy lights, replacing lamp shades and candle holders and bunting with our Christmas favourites.  The winter books fill the basket in the lounge, and we've loved reading all our old favourites today!

I've written before about our holiday traditions.  Last year, I scribbled an angry letter to Santa. I feel calmer this year; maybe I've forgiven him now.  I'm more focused on creating and expanding our own  ideas of celebration, rather than trying to fit in or keep up with the usual flow.  We like to latch onto traditions and ideas that better express who we are as followers of Jesus, rather than who we are as consumers of the latest stuff.

Our "St Nicholas bag", an idea born out of reading about the first St Nicholas, was very popular the first year we tried it.  St Nick was known for his anonymous giving, so we dropped extra coins and cash into a cloth bag set out for the purpose; visitors and friends were invited to do the same.  At the end of the holidays, we counted up the cash and made a decision together about the recipients of the little fund, all anonymous.

Last year, we tried to replicate the idea but it didn't work well.  I'm not sure why; maybe the recession?  So this year, I knew we needed something new.

Together, my friend Hannah and I thought of thirty-one "Random Acts of Kindness".  She wrote them onto strips of paper, and the St Nicholas bag has been filled with these folded strips.  We are taking one out every day, and seeking to complete that particular act of kindness for the day.

Today, our challenge was to write a letter to a faraway friend.  Coo, Lefty, and Righty sat down to write or draw quite happily.  Mr J opted out today, but I think that when he sees how much fun the others are having, he might join in!

Thursday, November 29, 2012

Homemade Candles

After two years of storing candle-making supplies, I finally worked my way through enough of the other projects on my creative bucket list to justify using them!

With caution, as Coo was working on her own paper doll project nearby, I melted soy wax flakes in a double boiler over a low heat.  "Double boiler", in my case, is a stainless steel pot filled with water and a stainless steel bowl fitted over it.  While the wax melted, I hot-glued pre-tabbed wicks to the bases of glass jam jars, using the tube part of a dismantled ball point pen to stabilise them.  Then I clipped each wick end with a clothes peg and balanced it on the jar opening to ensure the wick stayed straight.  These prepared jars were placed inside the oven on its lowest heat setting to warm.

When the wax had finished melting, I checked the temperature [150-180F is apparently best] and stirred in the fragrance oil, about 3ml of fragrance per 100g wax flakes.  The molten wax poured as easily as water into the hot jars.  I checked the steadiness of the wicks and set the candles aside to cool.


Five hours later, I re-heated a small amount of remaining wax to 180F and poured a thin layer into each cooled candle.  The next morning, the candles were completely solidified and smelled delicious!


Later, I re-read for the umpteenth time an account of 1850's candle-making in Laura Ingalls Wilder's book, Farmer Boy. Almanzo's mother didn't purchase her candle-making supplies on eBay or Amazon.  All the ingredients for her dipped candles, which were necessities, came from their farm and were fully sustainable.  

As much as I've loved these forays into homemade soap and candle making, I can't help but think that I'm hardly homesteading it!  

However, Coo is here with me, busily colouring and cutting out her own paper doll clothes as I write while the candles are solidifying.  Her paper dolls have tons of clothes and hats and accessories.  But she is not satisfied, and insists on creating her own clothes for the dolls.  

And I realise that she soaks up the "make-it-yourself" philosophy as we work together, me on candles and she on paper doll clothes, just as I did myself many years ago with my own mother.

If you enjoy reading about DIY, making do, homemade and handmade, click below to visit Red and Honey, and view links for a community of bloggers who post about their greener solutions every Thursday.


{All of my candle supplies apart from the soy wax were purchased from eBay shop Candles and Aromatics.  The eco soy container wax came from eBay seller Torbay Supplies, and although I initially bought it in smaller amounts of one kilo, it's much cheaper in the long run to fork out a bit of extra money and buy a box of ten kilograms!]

Monday, November 26, 2012

Girls' Time

Coo and I went out together on Saturday afternoon, just the two of us, to Birmingham Museum and Art Gallery and viewed their pre-Raphaelite exhibit on loan from the Tate.  BM&AG already possesses a permanent collection of pre-Raphaelite art, but the Tate exhibit includes John William Waterhouse's painting" The Lady of Shalott", one of my favourites. Anyone who's ever read Anne of Green Gables will appreciate the beauty of this painting as well as the comic reminder of Anne's disastrous dramatic adventure in which she pretends to be the Lady!

I'm not sure how much of Saturday afternoon Coo will remember, but I loved every minute of it.  We talked about the paintings that caught her eye.  Predictably, these were the ones of women with flowing gorgeous dresses and incredibly long hair.  She loves pretty clothes and hair so much!  

We travelled there and back on the train.  Coo enjoyed talking about the people we saw and what they were wearing.  She was also fascinated by the fountain in Victoria Square, and walked all the way around the wall surrounding the fountain, holding my hand.  We sipped hot drinks from Starbucks and trudged through cold rain.

As wonderful as our afternoon --"girls' time", as Coo calls it-- was, we were happy to get home to see "our boys" --Daddy, James [friend living with us this year], Lefty, Righty, and Mr J!

Friday, November 16, 2012

Making and Doing

Following on from my last post, in other creative news, Mr J has been inspired by reading about Egyptian mummies and decided to make his own.


Over the course of several days, I've found his large mama-made rag doll in various places all over the house, swathed in scarfs and finally a blanket.  One night I even found it lying at the end of our bed with a Darth Vader mask carefully placed over the face.  Mr J has been reading a world history book aloud to myself, Lefty, and Righty; and his mummy-making inspiration appears to be coming from this book.  We all know how he likes to act out what he reads.  

At the instigation of our friends Lizzie and Teresa, the boys helped create a homemade Lord of the Rings-themed floor-sized Monopoly game.  They love playing it!


And... it's that time of year!  In spite of the brevity of our summers, it's now cold, and we need warm clothes to wear.  Jeans with holes in the knees will not do anymore. Two well-worn pairs became shorts, while three less-worn pairs took on personalities of their own.  Those faces are created from appliqued felt over red fleece patches.  Lefty wanted teeth on his, but Mr J preferred fangs.  Love the daughter's tights/flip-flops combination there on the left!


Thursday, November 15, 2012

More Soap-making


Another month, another batch of soap.  This is my fourth session of soap-making this year, so far.

I'm still using recipes from Smart Soapmaking, by Anne L Watson.  Tonight, it was the "All-Veggie Grocery Store 1", mainly because it uses only olive and coconut oils, of which I have plenty.  It felt a bit like Christmas when, before tea this evening, I discovered a little stash of unrefined coconut oil and extra-virgin olive oil in my under-the-stairs cupboard.  They had fallen behind my box of soap supplies and were overlooked during my last two soap-making endeavours.  

This soap turned out great, as usual.  Anne Watson's recipes just don't seem to fail, so far.  I am learning to read the signs of the soap changing instead of continually checking the thermometer as I work, and find it easier each time to complete the soap without going over the instructions again, particularly around the initially tricky lye-mixing step! This latest batch was scented with equal amounts of patchouli and lavender essential oils. I love that addition of earthy patchouli; the floweriness of lavender on its own is too sweet for me.

I need more shea butter for the next batch of soap, and a few more essential oils.  A soap mould would be nice, too, as the cardboard box I've been using is starting to show signs of wearing out.  I've added a wooden mould especially for cold-process soap to my Amazon wish list, so we shall see!

I'm meeting up with other crafting friends soon for a craft afternoon, one I've been attending regularly.  Originally, I meant to take along my sewing machine, but instead I'll be working on our family's Christmas cards.  I've been sending cards with enclosed family photos for the last ten years, mainly for the benefit of faraway family and friends.  Most years, I've purchased cards, but for a handful of crazy Christmases, I've made them.  It's a bit like giving birth.  You forget about the intensity of it until you go through it again. So yes, this year I'm making cards. In spite of the work, it is satisfying to see the result and know that somewhere in the world, loved ones who aren't able to connect with us often will be appreciating those handmade cards and photos.

Since I've been going on about all this homemade stuff, check out more eco-friendly ideas from Beth, one of the hostesses of Your Green Resource.  She's gathering plenty of great links from other bloggers centring around real food recipes, upcycled and repurposed projects, organic gardening, thrifty solutions, and natural/green DIY.  If you share any of these interests, you'll love this concentration of information from other bloggers.

Saturday, October 27, 2012

Closer to November Than September

I haven't spent all my time baking in the last few weeks, though the recent barrage of recipe posts might give that impression! 

We've had an interesting week.  A second Hobbit Second Breakfast, a day out to the science museum, a peek at our local art gallery's Damien Hirst exhibition [composed mostly of one lamb floating in formaldehyde --slightly underwhelming], a visit from our homeschool assessor, a crafting afternoon with other creatives, a speedy funeral for two expired goldfish, visits from family and friends both old and new, and yes, some baking!

Last but not least, we've endured almost constant fighting between the three boys.  This mama had tried to leave the lads to sort things out themselves, but it has become impossible to ignore as their behaviour was beginning to have an adverse effect on the rest of the family. Coo has been resentful and grumpy as she's been subjected to listening to the almost-constant insults and rudeness exchanged by the male contingent of under-12's in our house. Dan felt the issue was connected to lack of sleep, so we explained this to the guys and asked them to refrain from reading in bed last night in order to be able to fall asleep early. They did so, and stayed in bed later this morning, and we have noticed a positive shift in their attitudes today; for which I'm very thankful!

I cannot believe how quickly the days are falling away now until the end of the year.  Christmas cards are waiting to be made, and baking plans must be drawn up for December.  The "to-sew" pile keeps growing, in spite of the crafting afternoon, and there are many more ideas in my head than space in my days.  

Always, always, I must remind myself that these are times for which to be thankful.  I am even thankful for the grey muddy rain of our October, for it sometimes preludes rare days like today.